Saturday, June 14

We interrupt this blog-cast...

Well, I won't be posting for about a week. For a change though, it's not just because life is going by too fast and I'm just not taking the time or feeling the urge -- rather it's because I'm not around a computer! About 2 dozen of us (18 students, 4 adults) are heading off to Ohio for a week of work and fun. 12-passenger vans, here we come! Two of 'em! Plus trailers! For a 12-hour minimum trip! And that doesn't include the closed-due-to-being-flooded highways that we have to circumnavigate in Wisconsin. And the potty breaks, oh the potty breaks, I'm already scared about how many hours of my life I will lose at random truckstops between here and eastern Ohio...

Anyway, we'll be staying at Beulah Beach Camp & Retreat Center in Vermilion, where we'll be working two of the days, and also going into Cleveland, where we'll be putting on Backyard Bible Clubs three of the days. And to start our week, we'll be at nearby Cedar Point, "The Roller Coaster Capital of the World!"

(

Wednesday, June 11

Front Door Garden

Last year, we got some nice lettuce and spinach from our SFG, but then the weather got too hot and the rest of our stuff "bolted" and turned bitter. Then I read somewhere that salad grows well when it gets just morning sun, so figured a spot by our front door would be perfect. My lettuce experiment is getting started a little later than I would've liked but figured first step is to build the bed. I'll worry about planting it later. So yesterday, I got to wield some power tools and turn this:

into this:
Well, the 2'x4' plywood bottom isn't shown in the top photo, but everything else came from random wood left in the shed by the previous owners... At first I wasn't sure how it would all go together (wanted to keep the plywood base a little elevated above the top of the wall, needed a way to keep the box from tipping over, etc.) but hooray for Google Sketchup where I was able to model a mock-up, test out ideas virtually, even get the needed dimensions once I'd decided on a design. Mmm, brought me back to my days of teaching Pro/ENGINEER.

And just 'cause I'm a geek and 'cause I love the "sketchy lines" setting in Sketchup, here's a image capture of the virtual box... Anyone need anything modeled? (as in virtual 3D, not catwalk) Suz, I think I hear bunk beds calling my name next... : )

Next, sanding, painting, mixing dirt, planting (lettuce seeds and probably a few flowers too). Better get a move on or it'll be 2009 before I harvest any salad.

Monday, June 9

Wall of Photos

Unlike last month's practical yet dismal and dinky little shelf, here's a home dec project that I actually think looks nice. And it's unlike the shelf in another way too. Whereas the shelf took about an hour or so from had-the-idea to it's-hanging-on-the-wall, this project took a little longer. About 2 years or so. I forget the particulars but it went something like this:

Step 1: Take a trip to IKEA and buy a bunch of frames (that are actually just pieces of hardboard with same-sized pieces of glass that clip onto the front of them. Very "modern." Very cheap.). Put them in a cabinet and let them sit for a few months.

Step 2: From the fabric stash, pull out some nice grey fabric (up close, it's actually textured black and white speckles and I think it goes really nicely with our grey leather sofa set). Cut out a square and glue it over the hardboard of one of the frames, because the hardboard is a rough, ugly brown and this grey fabric is pretty. Then pile the one covered frame and the rest of the fabric on top of the other frames still in the cabinet and let it all sit for a few more months.

Step 3: Eventually cover the rest of the frames, but not all in one sitting. No, let the project sit for months in between as needed. Also, cut out white papers to act as a crisp border, sandwiched between the background fabric and the photos. Add photos to the frames, willy-nilly, as you find them.

Step 4: Cut yellow sheets of paper to be the same size as the assorted frames (12 9x9s, 8 5x7s). Use Post-it notes to affix them to the wall. Rearrange them. Rearrange them again. Decide that you can't decide how to arrange them. Take them all down and stack them on top of the frames in the cabinet for a few months.

Step 5: Be a dork and draw a bunch of little rectangles and squares in Microsoft Word, then arrange and rearrange them there on the computer ad nauseam. Get the yellow sheets back out of the cabinet and Post-it them back on the wall using the dorky Word chart as a guide. Let them hang there "overnight" while you mull over their placement and look for nails, where "overnight" means "for a few months." Routinely ignore people who ask questions like "What's the deal with the yellow papers?"

Step 6: Finally, bang some nails in and hang the frames! Realize it looks rather silly with half the frames still empty (but of course, first let them hang empty like that for a few months). So cut some 3.5x5 and 5x7 rectangles from the "modern art" paintings your girls did the other day and tuck them in the frames "just for now" until you get more correctly-sized photos. (Unfortunately, 4x6s--which I have gobs of--don't work.) Fall in love with the paintings and photos mixed together, with the colors the girls used and the designs they created. And rejoice that you aren't always "on the ball" with projects and therefore weren't intentional about ordering enough pictures to fill the frames and therefore looked for another source and therefore stumbled on something beautiful.

Thursday, June 5

This year's "SFG"

How is it already June and I still haven't posted anything about our Second Annual Attempt To Grow Something, a.k.a. gardening. We had so much fun with our little 4'x4' Square Foot Garden (SFG) last year:
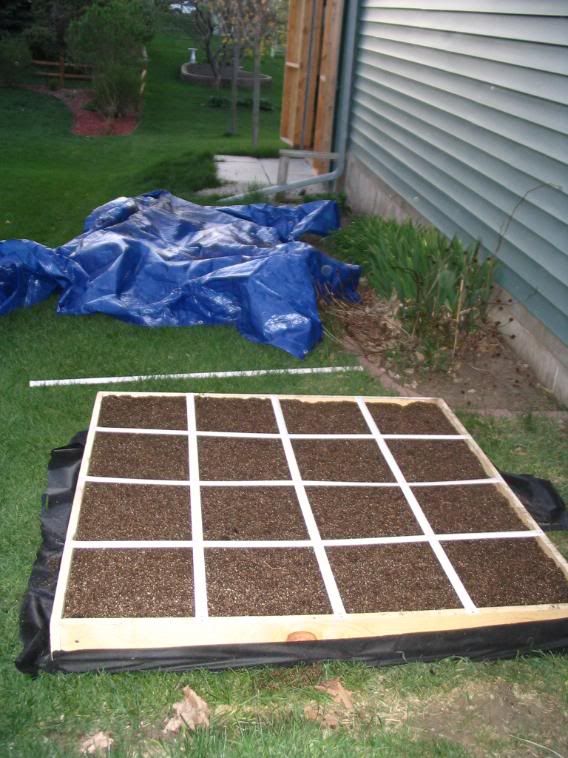
On the left is when we'd just built our first square, not sure we'd even planted anything yet. And on the left is how it looked halfway through the summer. At that point, we still had beans, green onions, carrots, tomatoes, peppers, and cukes. And we'd already enjoyed lots of lettuce and spinach as well as radishes. (For more images--132 of 'em!--and captions, click here.)

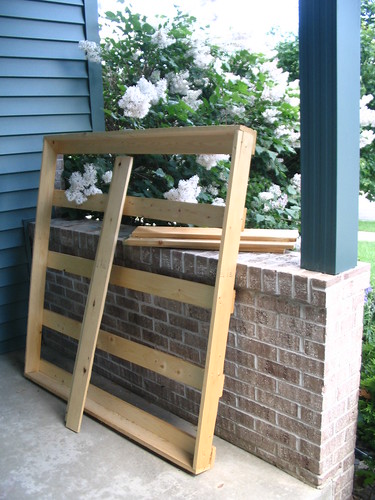
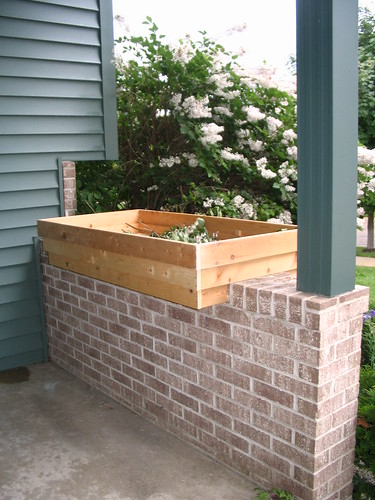
This year, we decided to expand, doubling our area with a new 8'x2' bed. Instead of using groundcloth between the grass and our growing soil like last year (grass still grew through), we're trying something new and using cardboard. Then we filled it up with "Mel's Mix" (1/3 compost, 1/3 peat moss, 1/3 coarse vermicullite). We'll need to add some sort of trellis too, since we plan to put all the tall stuff in this bed this year.

To get last year's square ready, all we had to do was add some new compost to the "Mel's Mix" already in there and smooth it out. Well, that was my plan. But then I started finding the "seeds" (a.k.a. stones) that Heidi had planted this spring. So I ended up going in with both hands and mixing it all up, plucking out stones when I found them. Ah, I do love the feel of light, crumbly soil slipping between my fingers!

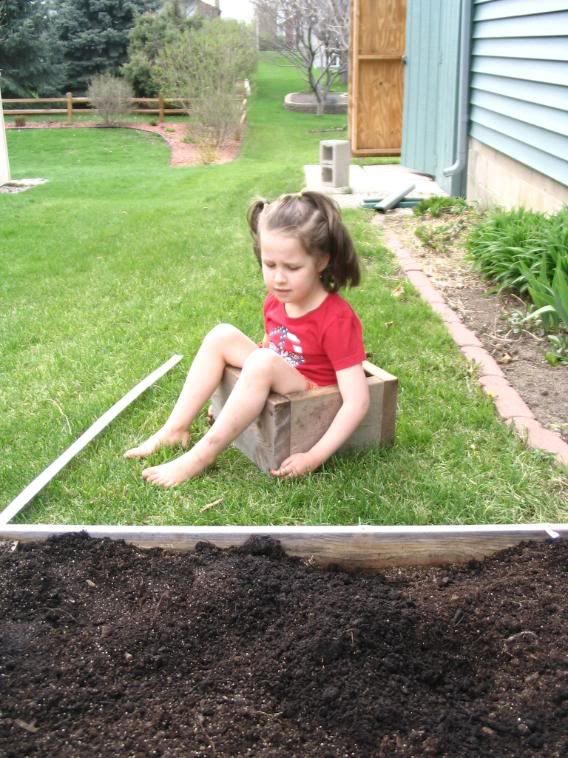
While I worked, the older girls were out with me, asking questions, digging around, being silly. I asked Heidi to go find the "carrot tower" in the shed, describing to her four pieces of wood nailed to form a square. She lugged it out and was messing around with it. Next thing I know, I hear, "Mommy, I'm stuck!" Am I a bad mom for just laughing when she continued with "No, don't take a picture! Come here and help me please!"? (She wasn't very stuck; I told her to lift herself out and she had little trouble doing that. It even became a game for the next while: get stuck, lift out, get stuck, lift out, etc.)
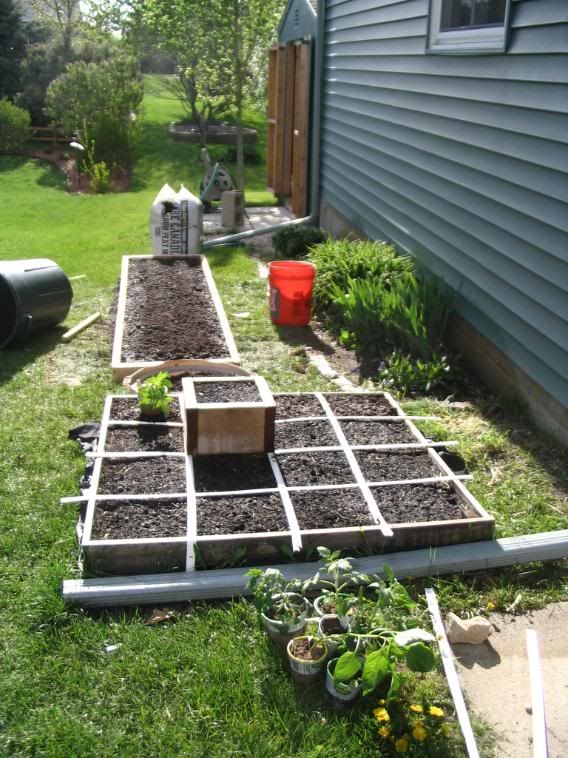
On the right, you can see the carrot tower in place in the square bed (as well as the now-soil-filled long bed and, in the foreground, some of the seedlings that are going in the long bed). Since the beds are only 6 inches (15 cm) deep, we give the carrots extra room to grow by putting this "tower" on their square and planting the seeds at the top surface of the tower. Even with that extra space, some of my carrots last year still made it all the way down to the groundcloth, then starting to grow a little bubble at the end of their taper since they couldn't grow deeper. A funny little surprise when I pulled them up...

Wednesday, June 4

Outdoor safety gates for my littlest climber...

I have a little munchkin who loves stairs right now. The carpeted half-flights of our split entry make me nervous enough; there's no way I want her near our deck stairs. But man-handling one of the heavy chairs on our deck onto its side and wedging it into the opening at the top of the stairs every time we're out on our deck is not a acceptable long-term solution. And there's the problem of what to do when we're all outside in the yard. I turn my head for two seconds and she's already clambered up five steps. So a couple weekends ago, passing by a garage sale, I saw the answer. Or answers. One nice, strong, secure Evenflo gate for the top of the stairs...


and another for the bottom...


And boy was it nice having two drills - one with a drill bit, the other with a driver head. I now want that for all future projects! (Thank goodness for nice neighbors who willingly let me borrow their drill. And who gave me a whole box of screws too after seeing the hardware I'd scrounged up that just wasn't working for me.)


And speaking of woodworking, there's fun stuff up ahead! Right now, it's just a pile o' lumber, a non-too-comfortable "bench" for the girls. But soon...

LinkWithin

Related Posts with Thumbnails