Sunday, January 31

Cardboard Ships

Apparently my girls aren’t the only ones obsessively reading or listening to the Chronicles of Narnia and then running around, recreating the scenes, British accents and all.

IMG_3722

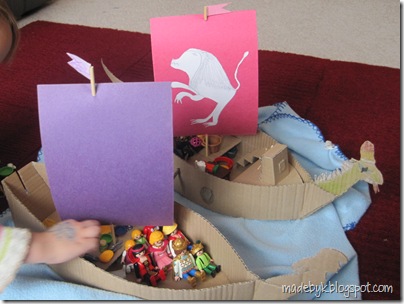
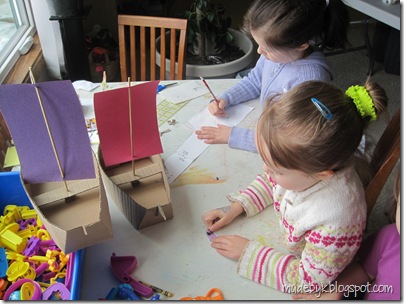
A post by Lorraine over at ikatbag came at the perfect time last week, just when I’d been feeling the need to work on a project with the girls, but wasn’t sure what it should be—something fun that would grab and keep their attention for a while. Narnian ships, made out of cardboard – pattern included – was just the project we needed!

IMG_3720

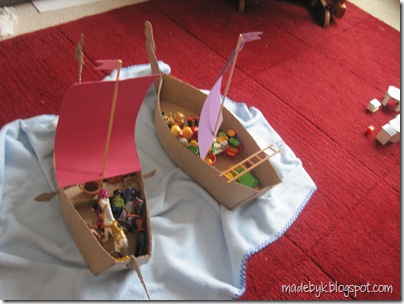
We ended up with two ships, both of which departed from the design of the Dawn Treader in the story. Heidi’s had the dragon figurehead… but a red sail, decorated with a white Aslan.

IMG_3721

And while Sophie’s sail was purple just like in the book, she wanted a mermaid at the front.

IMG_3734

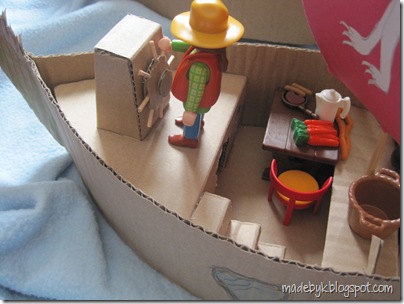
The scale of our insides was a little inconsistent – playmobile people make great captains at the helm…

IMG_3723

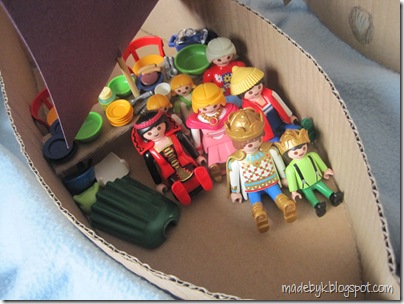
…but are a little too big to fit into their quarters below deck.

IMG_3726

To avoid getting small pieces stuck in those tiny quarters below, I made it so the whole floor could be lifted up.

IMG_3725

All aboard!

IMG_3724

Over the next few days, it was fun to see the girls add on – a treasure chest (filled with a crown, a “fancy pillow,” a wand, and a glass slipper among other things, some more decorations, beds, lockers and who knows what else.

Thanks Lorraine! You inspired not only me, but also a friend who visited, went home with my pattern pieces and some cardboard and made two for her girls too!  

Tuesday, January 26

Continuous Family Calendar

Funny story at the end, but first…

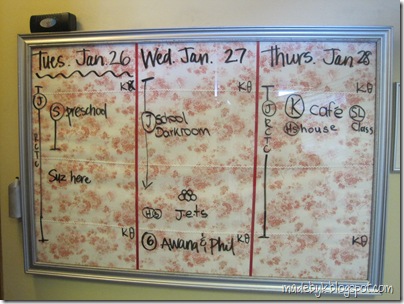
I keep track of all our events, appointments, and such electronically (in Outlook’s calendar) but a big problem is that usually I’m the only one who looks at it. So a few years ago, we implemented a new system, which looks like this these days.
IMG_3753

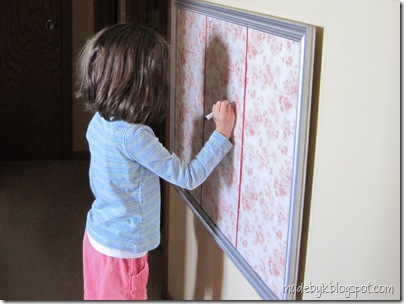
On it, we can see the events of the current day as well as the next two. Circled letters stand for the person(s) involved in the event. Every evening, I erase the current day and its notes, write a squiggly line under the next date to indicate it’s the “current day” now, and fill in the empty spot with the new date, three days away, and its events. So, the current day just keeps cycling through the columns – left, middle, right…

Any large erasable board would work; I chose to make my own wipe board. It hangs in our hallway just off our kitchen so everyone can check it and know what’s happening. Additionally, it’s helped me so much because it forces me to look at my electronic calendar each evening, specifically three days hence, so I know what to add to the wipe board. I can’t tell you the number of times I’ve said “Oh, that’s right! I’d forgotten!” And best of all, I still have two full days if I need to prepare anything for that forgotten event.

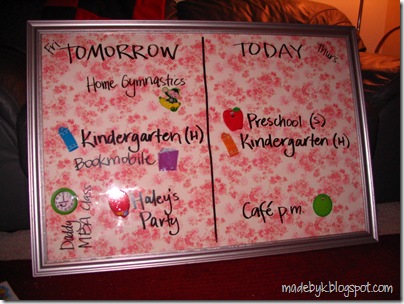
We used to just show two columns: “today” and “tomorrow.” We also had a bunch of bright clingies that we’d received with another laminated calendar a while back. Since none of the girls were reading yet, it worked well to help give them an idea what was going on. e.g. crayon = school for Heidi, apple = school for Sophie, red balloon = something fun!
DIYwipeboard (12)

Unfortunately, the clingies eventually lost their clinginess and all my attempts to revive them were in vain. Am now trying to think of ways to make (or buy?) some. Any ideas or leads?

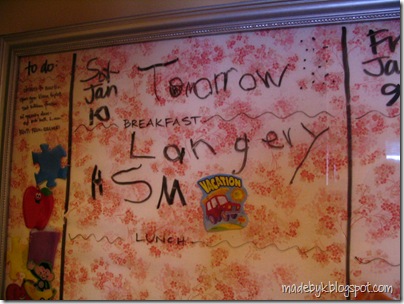
I’ve started to loosen my grip on the reins of control and perfection by letting Heidi write some of the stuff too. Loved this from a year ago when she was just learning to read… Our task for tomorrow: laundry.
DIYwipeboard (14)

In the photo above, you can see that I was still marking lines between days, as well as lines for our meals (which made it easier to see when events were happening in a day), with the erasable pen. And they were constantly getting erased.

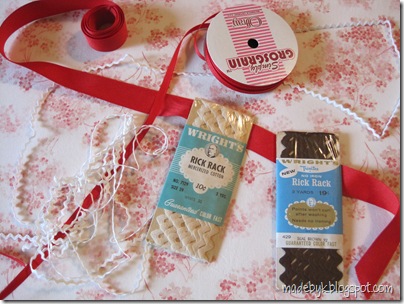
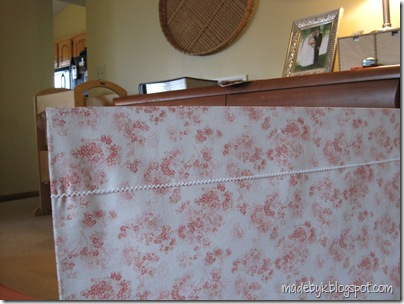
I finally got smart and added some ribbons and rick-rack under the glass to designate the lines instead. It’s so much quicker now to erase a day and write in the new details for the next day.
DIYwipeboard (17)

Well, I hope that covers it. If not, you can always ask.

So to finish, my funny story:

In my quest to add more structure to my life this year, I certainly think it’ll help that my cousin Jana is living here with us. Some of her über-responsible, über-orderly tendencies will surely rub off on me, right? Yesterday morning, she had to be out the door at 7 a.m. I was so surprised to find her still in bed, asleep, at 6:57. She’d never overslept before; apparently, the volume on her alarm clock had been turned down to silent by accident.

So what does she say while she’s rushing to get dressed – in the clothes she laid out the night before – and grab all the things she needs for the day – all neatly lined up next to her door? She says, and I quote, “Oh shoot. Now I won’t have time to make my bed!” 

And did I mention she’s 19? Oh, yes, I do hope I learn some things from her these two years she’s with us!
Sunday, January 24

Hanging a Large DIY Wipe Board

As mentioned here, one of my framed glass wipe boards just hangs from a picture wire. Which is fine because I only write on it once a week.

But the other one is written on daily. And is bigger and heavier. So I wanted something stronger and more stable.

boards1French Cleat

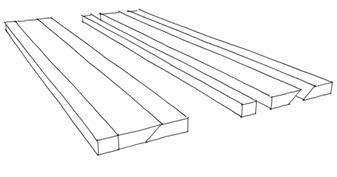
Years of watching HGTV to the rescue! (Or was it on Trading Spaces?) …I remembered seeing a large headboard attached to a wall using a french cleat, which is made from a board cut in half lengthwise at a 45° angle. One half is attached to the wall and the other half to the hanging piece, such that the two halves lock into place. Here’s a video in case my picture there isn’t enough.

Note: there also needs to be a spacer at the bottom to keep it from swinging towards the wall and tilting the whole piece. So I started with a wider board and made two cuts: one straight (creating the spacer), one angled (creating the cleat pieces).

boards

Another Option

boards eyescrews iso

boards eyescrews

If you don’t have a way to make an angled cut but have some eye screws, another option is to twist the eye screws into the back of the frame near the top. Then attach a board (e.g. a 1x2) to the wall, rest the eye screws on top of it, and drive a nail or screw through each eye screw hole into the top of the wall board. Again, you’d need a spacer at the bottom too. 

Bi-Level Hanging

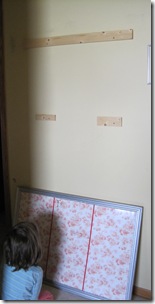
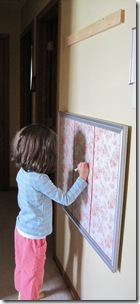
In my case, I wanted to hang the board out of Lucy’s reach, but I also wanted Heidi to be able to comfortably write on it at times. Lucky for me, my cleat boards were too long. So I cut off the extra 5” and used the two pieces to form a second hanging level – you can see them in the photo below left. Photo below right shows it hanging at that lower level and you can also see the long high-up piece from which it usually hangs. (Yeah, that was  out of Lucy’s reach… before Lucy figured out how to push various pieces of furniture over there as stepstools!)

DIYwipeboard (24)DIYwipeboard (19) 

boards2 Note: I screwed the short little pieces—and the long piece too—into studs for added strength.

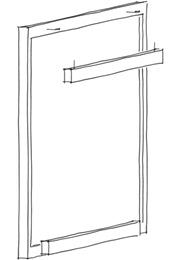
I also made sure, when placing the lower level, that it was high enough so it wasn’t in the way of the spacer at the bottom of the frame. See figure at right.

You could do the bi-level hanging with the eye screw option too; you’d just need to attach another 1x2 with nails/screws in the right spots.

Happy decorating!

Friday, January 22

DIY Wipe Board that’s Pretty too

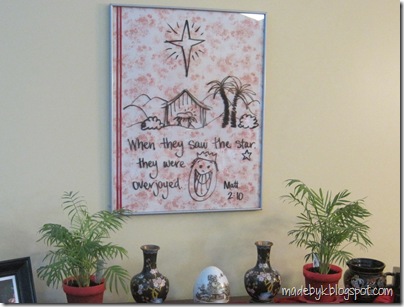
I love the function of wipe boards but I don’t love their form. So a few years ago, I made my own wipe board. Compared to its white plastic cousin, it’s a breeze to wipe off and I think it looks a whole lot nicer hanging in my home.
DIYwipeboard (19)
Six months later, I made another one, seen above. And took pictures of the steps. Then never posted them. And still not sure I really need too – my cousin (who maintains she’s not crafty at all, but I disagree) made herself a board just based on the picture in the original post.
But I avoided some mistakes my second time around, so here’s my somewhat superfluous “how to make your own DIY wipe board.”
(I’ll leave the explanation of this second board’s purpose for another post – preview: it’s a bit of structure I implemented in our home that actually lasted longer than the usual two weeks or so!)
Materials:
DIYwipeboard (0)
I used a large frame with a glass insert. Some plastics inserts can also be written on with dry erase markers; but be sure to test it first! And be a little more inconspicuous about it than me, who started to write a big “Hello” on another frame insert and realized after the first four letter that it wasn’t coming off…
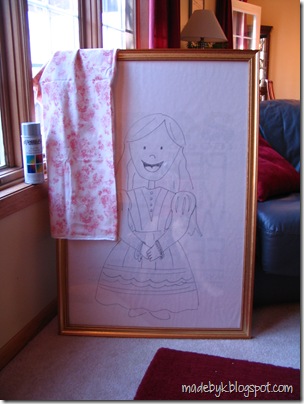
Also needed a big enough piece of light-colored fabric. I used what I had on hand. A solid with a small stripe/accent of printed fabric might be nice too.
Paint, because I wanted to change the color of my free frame.
And various trims. On my awana verse board, the ribbon stripes were just for decoration; on the larger one, I used them to mark off sections so I wouldn’t have to keep drawing the section lines in by hand.
DIYwipeboard (15)
Oh, and I used some white paper – see step 5 below. 
Oh, and some tools for step 1 below – I used a screwdriver.
Oh, and some tape or hot glue or such.

Procedure:
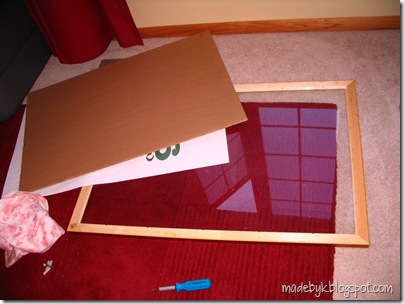
1. Undo whatever is holding the glass/backing/etc to the frame (in such a way that you can redo it later).
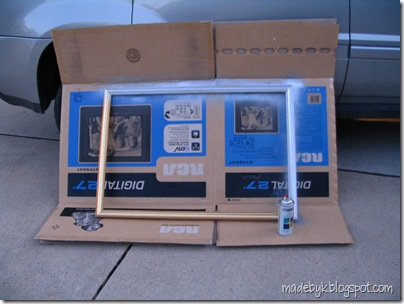
DIYwipeboard (2)
2. If desired, paint your frame. (Clearly, I took these photos a while ago; my driveway is currently covered in about 1/2” of ice… But cold weather is not a reason not to spray paint! That’s what garages are for.)
DIYwipeboard (3)
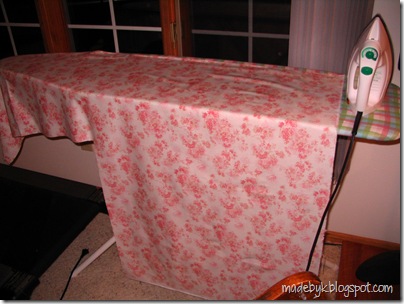
3. Do yourself a favor and iron your fabric. The glass pressed against the fabric will likely not be enough to squish the creases out. Ask me how I know that… 
DIYwipeboard (4)
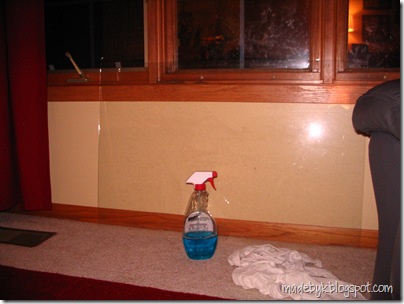
4. Do yourself another favor and clean the glass. Both sides. Trust me.
DIYwipeboard (5)
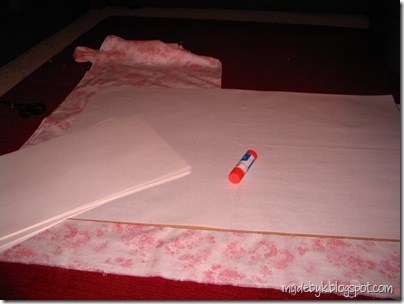
5. If the backing is dark and makes the fabric look dingy because the fabric is so light, cover the backing with some white paper.
DIYwipeboard (6)
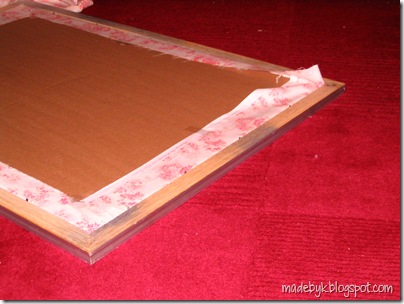
6. Wrap the  fabric around the backing, adhering it as needed. I was a little skimpy with my tape. Hot glue might’ve been faster/better/easier but I didn’t own a gun yet at the time. Shocking, I know. That I, as an avid crafter, lived 33 years without owning or even using a hot glue gun!
7. Anyway, then pop the glass and backing back into the frame and redo whatever you undid in step 1.
DIYwipeboard (7)
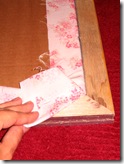
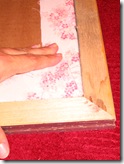
Here’s a few (overexposed) close-ups of the corner fold I did…
 DIYwipeboard (8)DIYwipeboard (9)DIYwipeboard (10)
And it’s done.
Oh, as for hanging them: The awana one, below, just hangs from its wire deal in back, like a normal picture. Since I only write on it weekly, sometimes I leave it on the wall when I write, but it’s also small and light enough that I can lift it off the wall easily. The other one is larger and heavier and written on a lot, so I used a different method… which will receive it’s own post.
IMG_3673
P.S. I move things around the house pretty regularly, including all the stuff on the sideboard under the wipe board. But the short, wide-mouthed pitcher (bottom right corner) usually stays because that’s where I store a couple markers and a paper towel “eraser.”

Friday, January 8

three words for 2010

Happy New Year! Twenty-ten. Wow!

Below is my reminder note of the three words I picked for 2010…

3words2010

(fonts used: Home Remedy, Amanda’s Hand, Sketchy Times)

To back up a bit, last year around this time, rather than writing down New Year’s Resolutions, I got the idea from this post by Chris Brogan to pick three words for the year. It’s a very interesting article; in a nutshell (in Chris’s words):

If you want to try the process, it works something like this: think of how you want to be successful in 2009. Then, try to think in even broader terms. Extrapolate on the broader terms, and find one word to hang the idea on.

You do that three times, and end up with three words to guide you throughout the year as you make goals, choices, etc. And I liked last year’s experiment so much, I’m trying it again this year.

My three words for 2010: Struktur. Spontan. Schenken.

Or in English: Structure. Spontaneous. Give. As Chris points out, the words don’t need to make sense to anyone but the person who picked them. But I do love hearing a bit of the reasoning behind his words (like his 2010 ones here). So here are some of the thoughts behind mine…

Structure: I have some dreams for this year, but they won’t happen without some structure in my life. And since I’m not that way by nature yet I see its importance, I figured I’d put that as my foundational word.

But then I didn’t want to totally dread the year ahead, so I added: spontaneous. And loved that choice even more after I looked it up!After reading various meanings, this word turned into more than just “spur of the moment” as in “Hey girls, let’s go have our lunch at the park today!” To me, it now also signifies acting in a way that’s consistent with my “internal forces.” Staying dialed in with who I am on the inside to the point where it regularly gurgles up naturally, spontaneously, to the outside.

At this point, I switched to German because I was already starting to think about what these words would look like on my little reminder notes and realized “spontaneous” is about 40% shorter in German! (What?!? When is a German word ever shorter?!?) “Spontan” would fit so much nicer… Plus it could be a reminder to talk more German this year.

Lastly, schenken (or give): At a basic level, this touches on wanting to declutter my home some more and give the extra stuff away. But it also goes deeper, acting as a challenge to take a broader view of the world, to remember the many who are lacking access to education, medical help, not to mention the basics of shelter and food, and to give of my “wealth”. And deeper still, to be mindful of my ever-present pride and to choose instead live unselfishlessly, others-focused; to give of myself, to my family, friends, and more.

The fact that they all start with “s” makes me happy. The fact that one is a noun, one is an adjective, and one is a verb makes me crazy! But perhaps I can learn to loosen up on the inconsequential details this year… Or perhaps not.  I already got a lot to do in one year! : )

Last night, I finally popped the words into Paint Shop Pro, resulting in the picture at top. Next on the to-do list: print out a couple, paste ‘em up here and there… and let ‘em guide my year!

You got words?

LinkWithin

Related Posts with Thumbnails